Jumat, 12 September 2025

191+ Workbench Plus

Screwking philippines www.screwking.com.ph

Opening: A DIY Workbench Plus – More Than Just a Surface This post details how to build a robust and versatile workbench, perfect for a variety of projects. We'll go beyond a basic surface and incorporate features like storage, mobility, and adjustability to create a true "Workbench Plus". Let's get started!
Step 1: Planning and Design Before you start cutting wood, it's crucial to have a plan. Consider the following:
  • Size: How large do you need the workbench to be? Factor in your workspace and the typical size of your projects.
  • Height: The height should be comfortable for you to work at. A good rule of thumb is to have the surface at about waist height.
  • Storage: Do you want drawers, shelves, or cabinets? Plan where these will go.
  • Mobility: Do you want the workbench to be stationary or mobile? If mobile, you'll need to factor in casters.
  • Materials: Consider the type of wood you want to use. Plywood, dimensional lumber (like 2x4s), and hardwood are common choices.
  • Create a sketch or use a woodworking design program to visualize your workbench. This will help you determine the materials you need and how to cut them.
    Step 2: Gathering Materials and Tools Here's a general list of materials you'll need. This will vary depending on your design:
  • Plywood (for the top, shelves, and cabinet sides)
  • Dimensional lumber (for the frame and legs)
  • Screws (various sizes)
  • Wood glue
  • Casters (if making it mobile)
  • Drawer slides (if adding drawers)
  • Door hinges (if adding cabinets)
  • Finishing supplies (paint, stain, varnish, etc.)
  • Tools:
  • Saw (circular saw, miter saw, or hand saw)
  • Drill/Driver
  • Screwdriver
  • Measuring tape
  • Square
  • Clamps
  • Safety glasses
  • Hearing protection
  • Step 3: Building the Frame The frame is the foundation of your workbench.
  • Cut the lumber to the appropriate lengths according to your plan.
  • Assemble the frame using screws and wood glue. Make sure the corners are square.
  • Add cross supports to provide additional strength and stability.
  • If you're adding a bottom shelf, build a smaller frame for it and attach it to the legs.
  • Step 4: Attaching the Legs The legs need to be sturdy to support the weight of the workbench and your projects.
  • Cut the legs to the desired height.
  • Attach the legs to the frame using screws and wood glue. Make sure they are flush with the frame.
  • Consider adding additional bracing to the legs for extra stability, especially if you plan to work with heavy materials.
  • Step 5: Building the Top The workbench top is the work surface, so it needs to be strong and flat.
  • Cut the plywood to the desired size. You may want to laminate two or more layers of plywood together for added thickness and strength.
  • Attach the top to the frame using screws.
  • Sand the top smooth to remove any rough edges or splinters.
  • Step 6: Adding Storage (Drawers, Shelves, Cabinets) This is where you customize your "Workbench Plus".
  • Shelves: Cut the plywood to the desired size and attach it to the frame using screws or shelf supports.
  • Drawers: Build the drawer boxes using plywood and attach the drawer slides to the drawer boxes and the workbench frame.
  • Cabinets: Build the cabinet boxes using plywood and attach them to the frame. Install the doors using hinges.
  • Step 7: Adding Mobility (Casters) If you want your workbench to be mobile:
  • Attach heavy-duty casters to the bottom of the legs. Make sure the casters are rated for the weight of the workbench and your tools.
  • Consider using locking casters to prevent the workbench from moving when you're working on it.
  • Step 8: Finishing Finishing will protect your workbench and make it look great.
  • Sand the entire workbench to remove any rough edges or splinters.
  • Apply a coat of primer (if painting).
  • Paint, stain, or varnish the workbench to your desired color and finish.
  • Apply multiple coats of finish for added protection.
  • Conclusion: Your Custom "Workbench Plus" is Complete! Congratulations, you've built your own custom "Workbench Plus"! This workbench is now a valuable addition to your workspace, providing a sturdy and versatile surface for all your projects. Remember to take care of your workbench by keeping it clean and organized. With proper care, it will serve you well for years to come.

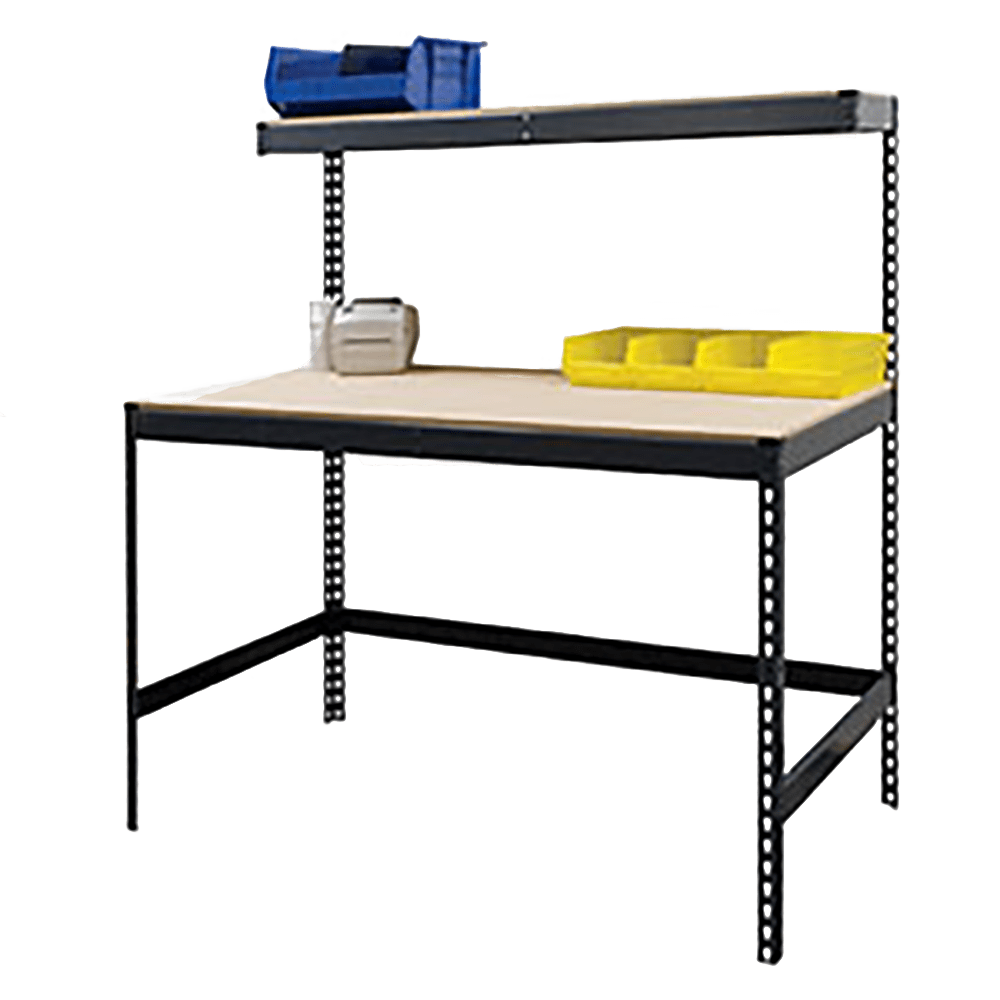
    Boltless Workbench Plus Bottom Shelf

    Boltless workbench plus bottom shelf allracksolutions.com

    Workbenches

    Workbenches allracksolutions.com

    Screwking Philippines

    Screwking philippines www.screwking.com.ph

    Kamis, 11 September 2025

    56+ Workbench With Built-In Power Strip

    Husky 4 ft. solid wood top workbench with storage-g4801s-us www.homedepot.com

    Introduction: Your Ultimate DIY Workbench Project Building your own workbench is a rewarding experience. Not only do you get a sturdy and customized workspace, but you also save money compared to buying a pre-made one. This guide will walk you through building a 56+ inch workbench with a built-in power strip, offering both ample workspace and convenient power access for your tools.
    Materials and Tools: Gathering Your Supplies Here's a list of the materials and tools you'll need for this project:
    • 2x4 lumber (for the frame and legs)
    • 4x4 lumber (optional, for heavier-duty legs)
    • Plywood or OSB (for the workbench top and shelf)
    • Screws (various sizes for wood construction)
    • Wood glue
    • Power strip with surge protection
    • Wire staples or cable clamps
    • Drill with drill bits
    • Circular saw or hand saw
    • Measuring tape
    • Pencil
    • Safety glasses
    • Hearing protection
    • Clamps
    • Wood filler (optional, for filling imperfections)
    • Sandpaper (various grits)
    • Polyurethane or other wood finish (optional, for sealing and protecting the wood)
    Step 1: Planning and Cutting the Wood Cutting List: Measure and cut the lumber according to the following dimensions (adjust as needed to fit your specific needs):
    • Workbench Top Frame: Cut two 2x4s to 56 inches (long sides) and two 2x4s to 24 inches (short sides).
    • Workbench Legs: Cut four 2x4s (or 4x4s) to 34 inches (or desired height).
    • Bottom Shelf Frame: Cut two 2x4s to 52 inches (long sides) and two 2x4s to 20 inches (short sides).
    • Workbench Top: Cut one piece of plywood or OSB to 56 inches x 24 inches.
    • Bottom Shelf: Cut one piece of plywood or OSB to 52 inches x 20 inches.
    • Support Braces: Cut several 2x4s to length depending on placement and desired support (e.g. 20-inch pieces)
    Remember to always double-check your measurements before cutting. Accuracy is key for a well-built workbench.
    Step 2: Assembling the Workbench Frame Building the Top Frame: Use wood glue and screws to assemble the 2x4s for the workbench top frame. Ensure the corners are square. Clamp the frame together while the glue dries. Attaching the Legs: Attach the legs to the inside corners of the workbench top frame using wood glue and screws. Make sure the legs are flush with the top of the frame. Again, use clamps to ensure a tight bond. Adding Support Braces: Cut and attach support braces between the legs to provide additional stability. Position these braces at various heights based on your need. Use wood glue and screws for secure attachment. These can be simple horizontal braces, or angled for greater support.
    Step 3: Installing the Workbench Top and Bottom Shelf Attaching the Top: Place the plywood or OSB workbench top onto the frame. Align it carefully and secure it to the frame using screws. Space the screws evenly around the perimeter. Building the Bottom Shelf Frame: Construct the bottom shelf frame using the same method as the top frame, gluing and screwing the 2x4s together, making sure it is square. Installing the Bottom Shelf: Attach the plywood or OSB bottom shelf to the bottom shelf frame. Now secure the assembled bottom shelf, using glue and screws to connect it to the workbench legs, usually a few inches from the floor.
    Step 4: Integrating the Power Strip Planning Power Strip Placement: Decide where you want to mount the power strip. Common locations include the underside of the workbench top, along the back of the frame, or on one of the legs. Mounting the Power Strip: Secure the power strip to your chosen location using screws, wire staples, or cable clamps. Ensure the power cord can reach an outlet without being stretched or strained. Consider adding a small wooden shelf or enclosure to protect the power strip from accidental damage. Wire Management: Use wire staples or cable clamps to neatly organize and secure the power cord along the frame of the workbench. This will prevent it from dangling and getting in the way.
    Step 5: Finishing Touches Sanding and Smoothing: Sand all surfaces of the workbench to remove any rough edges and splinters. Start with a coarser grit sandpaper and gradually move to finer grits for a smooth finish. Filling Imperfections: Use wood filler to fill any nail holes or imperfections in the wood. Allow the filler to dry completely and then sand it smooth. Applying Finish (Optional): Apply a coat of polyurethane or other wood finish to seal and protect the wood from moisture and wear. This will also enhance the appearance of the workbench. Follow the manufacturer's instructions for application and drying times.
    Conclusion: Your DIY Workbench is Complete! Congratulations! You have successfully built your own 56+ inch workbench with a built-in power strip. This sturdy and functional workspace will serve you well for many projects to come. Remember to always prioritize safety when using power tools and working in your workshop. Enjoy your new workbench!

    "bentism 48x24"" Workbench With Power Outlets, 1500w, 220lbs Load, Heavy-duty Steel"

    "bentism 48x24"" workbench with power outlets, 1500w, 220lbs load, heavy-duty steel" www.walmart.com

    Pinnacle 900 X 1800 X 600mm Matte Black Xl Timber Top Workbench

    Pinnacle 900 x 1800 x 600mm matte black xl timber top workbench www.bunnings.co.nz

    Husky 4 Ft. Solid Wood Top Workbench With Storage-g4801s-us

    Husky 4 ft. solid wood top workbench with storage-g4801s-us www.homedepot.com

    Rabu, 10 September 2025

    90+ Bird Feeder

    Amazon.com www.amazon.com

    ```html
    Introduction: Building a Simple and Effective Bird Feeder Want to attract beautiful birds to your yard? Building your own bird feeder is a fun and rewarding project. This guide will walk you through creating a simple, yet effective, feeder using readily available materials. This feeder is designed for versatility, allowing you to use a variety of bird seeds.
    Materials You'll Need:
  • One 2-liter plastic soda bottle (clean and dry)
  • Two wooden spoons or dowels
  • Strong craft knife or scissors
  • Drill with a bit slightly larger than the diameter of your wooden spoons/dowels
  • Birdseed of your choice
  • Optional: Sandpaper (for smoothing rough edges)
  • Optional: Wire or string for hanging
  • Step 1: Preparing the Bottle Use the craft knife or scissors to carefully cut two small holes directly across from each other near the bottom of the bottle. These holes will be used to insert the wooden spoons. The holes should be just large enough for the spoons to fit snugly. Repeat this process about 4-5 inches above the first set of holes, creating a second set of holes directly opposite each other.
    Step 2: Creating the Feeding Perches Insert the wooden spoons or dowels through the holes you created. Push them through until they are sticking out equally on both sides of the bottle. These will serve as perches for the birds and provide access to the seed. Make sure they are firmly in place. You can use a bit of glue for extra stability, if desired, but ensure the glue is bird-safe.
    Step 3: Making the Seed Dispensing Holes Use the drill and appropriately sized drill bit to make a small hole directly above each spoon, close to the bottle's surface. These holes will allow the birdseed to flow out onto the spoons. Start with small holes; you can always enlarge them later if needed. It's better to err on the side of too small than too large, as larger holes can lead to excessive seed spillage.
    Step 4: Creating the Hanging Mechanism Drill two small holes near the top of the bottle, opposite each other. These holes should be large enough to thread wire or strong string through. Thread the wire or string through the holes and tie it securely to create a loop for hanging the bird feeder. Ensure the loop is strong enough to support the weight of the filled feeder.
    Step 5: Filling the Feeder Unscrew the bottle cap and carefully pour birdseed into the bottle. Fill it to just below the top set of holes. Replace the cap securely.
    Step 6: Hanging and Enjoying Hang your bird feeder in a location where birds feel safe and have good visibility. A tree branch or a shepherd's hook are excellent options. Keep the feeder filled and clean it regularly to prevent the spread of disease.
    Conclusion: Attracting Birds to Your Backyard Congratulations! You've successfully built your own bird feeder. Now, sit back, relax, and enjoy watching the birds flock to your backyard for a tasty treat. Remember to keep the feeder clean and consistently filled to keep your feathered friends coming back for more. You can also experiment with different types of birdseed to attract a wider variety of birds.
    ```

    Amazon.com

    Amazon.com www.amazon.com

    Amazon.com

    Amazon.com www.amazon.com

    Amazon.com

    Amazon.com www.amazon.com

    Selasa, 09 September 2025

    84+ Woodworking Glider Chair Plans Pdf Free Download

    Free outdoor glider chair plans woodworkingchallenge.com

    Introduction: Building Your Own Woodworking Glider Chair Dreaming of lazy afternoons spent gently gliding in your backyard? Building your own wooden glider chair is a rewarding project that combines woodworking skills with the satisfaction of creating a comfortable and stylish piece of outdoor furniture. This guide provides a step-by-step approach to crafting your very own glider chair.
    Step 1: Gathering Your Materials and Tools Before you begin, it's crucial to have all the necessary materials and tools readily available. This will streamline the building process and prevent frustrating interruptions.
  • Wood: Select a durable, weather-resistant wood species such as cedar, redwood, or treated pine. The plans you choose will specify the required dimensions and quantities.
  • Fasteners: Gather screws (exterior grade), bolts, nuts, and washers appropriate for outdoor use and the thickness of your wood.
  • Gliding Mechanism: Purchase a glider hardware kit designed for chairs. These kits typically include brackets, bearings, and connecting rods.
  • Tools: You will need a saw (circular saw, miter saw, or hand saw), drill, screwdriver, sander, measuring tape, pencil, clamps, safety glasses, and a respirator mask (for sanding). A router with appropriate bits can be helpful for shaping edges.
  • Step 2: Cutting the Wood According to the Plans Carefully review your chosen woodworking glider chair plans. The plans will provide detailed cutting diagrams and dimensions for each piece of the chair. Accurately measure and mark each piece of wood before cutting.
  • Use a saw to cut each piece to the specified dimensions. Ensure your cuts are straight and precise for a professional-looking final product.
  • Label each piece clearly to avoid confusion during assembly.
  • Sand all cut edges to remove splinters and create a smooth surface.
  • Step 3: Assembling the Chair Frame The chair frame provides the structural support for the glider chair. This step involves connecting the various wooden pieces to form the chair's base, back, and arms.
  • Following your plans, assemble the chair's base frame using screws and wood glue. Ensure the frame is square and level. Clamps can be used to hold the pieces together while the glue dries.
  • Attach the chair back supports to the base frame. Reinforce the joints with screws and glue.
  • Assemble the armrests and attach them to the chair back supports and base frame. Ensure the armrests are level and securely fastened.
  • Step 4: Installing the Gliding Mechanism The gliding mechanism is what allows the chair to rock smoothly. This step involves attaching the glider hardware kit to the chair frame.
  • Carefully follow the instructions provided with your glider hardware kit.
  • Attach the glider brackets to the chair base and the corresponding brackets to the chair seat.
  • Connect the brackets with the provided bearings and connecting rods. Ensure the mechanism moves smoothly and freely.
  • Step 5: Building the Seat and Back Slats The seat and back slats provide comfort and support. This step involves attaching the wooden slats to the chair frame.
  • Cut the slats to the required length and width. Sand all edges smooth.
  • Evenly space the slats across the seat and back of the chair.
  • Attach the slats to the chair frame using screws. Ensure the screws are countersunk to prevent them from snagging clothing.
  • Step 6: Finishing and Protecting Your Glider Chair Once the chair is assembled, it's time to finish and protect the wood. This will enhance the chair's appearance and prolong its lifespan.
  • Sand the entire chair smooth. Pay particular attention to any rough edges or splinters.
  • Apply a weather-resistant stain or paint to the chair. Choose a color that complements your outdoor décor.
  • Apply a sealant or varnish to protect the wood from moisture and UV rays. This will help prevent the wood from warping or cracking.
  • Conclusion: Enjoy Your Handcrafted Glider Chair Congratulations! You have successfully built your own wooden glider chair. Take a moment to admire your craftsmanship and enjoy the comfort and relaxation that your new chair provides. Remember to periodically inspect and maintain your chair to ensure its longevity and safety. Regular cleaning and occasional re-sealing will keep your glider chair looking and functioning its best for years to come.

    Free Outdoor Glider Chair Plans

    Free outdoor glider chair plans woodworkingchallenge.com

    Glider Chair Plans Pdf

    Glider chair plans pdf woodworkingmaya.blogspot.com

    Glider Chair Plans Pdf

    Glider chair plans pdf pictureofwoodworkingtools.blogspot.com

    Senin, 08 September 2025

    156+ Woodworking Plans For Sale

    150 free woodworking plans & guides! in 2021 www.pinterest.com

    Opening: Get Ready to Build Your Own DIY Bookshelf! Are you tired of cluttered spaces and overflowing book stacks? A DIY bookshelf is the perfect solution! Not only will it provide much-needed storage, but it also allows you to customize the design to perfectly match your style and needs. This step-by-step guide will walk you through the process of building a simple, sturdy, and stylish bookshelf. Let's get started!
    Step 1: Gather Your Materials and Tools Before you begin, make sure you have all the necessary materials and tools. This will save you time and frustration later on. Here's a list of what you'll need:
  • Lumber (Choose your desired type and dimensions for the shelves and sides)
  • Wood screws (Appropriate length for your lumber thickness)
  • Wood glue
  • Sandpaper (Various grits, from coarse to fine)
  • Wood filler (Optional, for filling imperfections)
  • Paint or stain (Your choice of finish)
  • Safety glasses
  • Dust mask
  • Measuring tape
  • Pencil
  • Circular saw or hand saw
  • Drill with drill bits and screwdriver bits
  • Clamps (At least two)
  • Carpenter's square
  • Level
  • Step 2: Measure and Cut the Lumber Carefully measure and cut the lumber according to your desired bookshelf dimensions. Decide on the height, width, and depth of your bookshelf, and the number of shelves you want.
  • Sides: Cut two pieces of lumber to the desired height of your bookshelf.
  • Shelves: Cut the number of shelves you want to the desired width and depth of your bookshelf. Remember to account for the thickness of the side pieces.
  • Backing (optional): Cut a piece of plywood or thin lumber to the overall dimensions of the back of your bookshelf.
  • Double-check all your measurements before cutting to ensure accuracy. Always wear safety glasses and a dust mask when cutting wood.
    Step 3: Assemble the Bookshelf Frame Now it's time to assemble the main structure of your bookshelf.
  • Apply wood glue to the edges of one shelf where it will connect to the side pieces.
  • Position the shelf between the two side pieces, using the carpenter's square to ensure it's at a 90-degree angle.
  • Clamp the pieces together securely.
  • Predrill pilot holes through the side pieces and into the shelf. This will prevent the wood from splitting when you insert the screws.
  • Drive wood screws into the predrilled holes, securing the shelf to the side pieces.
  • Repeat this process for each shelf, making sure they are evenly spaced or at your desired positions.
  • Step 4: Add the Backing (Optional) If you choose to add a backing to your bookshelf, this step will provide extra stability and a finished look.
  • Apply wood glue to the back edges of the frame.
  • Position the backing piece onto the frame, ensuring it's flush with all edges.
  • Use brad nails or small screws to secure the backing to the frame.
  • Clamp the backing to the frame while the glue dries.
  • Step 5: Sanding and Finishing Once the glue has dried, it's time to sand and finish your bookshelf.
  • Start with a coarse-grit sandpaper to smooth out any rough edges or imperfections.
  • Gradually move to finer grits of sandpaper for a smooth finish.
  • If desired, fill any nail holes or imperfections with wood filler and sand smooth.
  • Wipe down the bookshelf with a clean cloth to remove any dust.
  • Apply your choice of paint or stain according to the manufacturer's instructions. Consider multiple coats for better durability and coverage.
  • Step 6: Final Touches and Placement After the paint or stain has completely dried, you can add any final touches.
  • Consider adding decorative trim or molding.
  • Install adjustable shelf supports if desired.
  • Carefully place your bookshelf in its desired location.
  • Use a level to ensure the bookshelf is standing straight.
  • Load up your bookshelf with your favorite books, decorative items, and more!
  • Conclusion: Enjoy Your New DIY Bookshelf! Congratulations! You've successfully built your own DIY bookshelf. This project not only provides functional storage but also adds a personal touch to your home. Enjoy your new space-saving and stylish bookshelf, and feel proud of your accomplishment! Remember to always prioritize safety when working with power tools and follow all manufacturer's instructions.

    150 Free Woodworking Plans & Guides! In 2021

    150 free woodworking plans & guides! in 2021 www.pinterest.com

    Free Woodworking Plans For 1,000's Of Projects

    Free woodworking plans for 1,000's of projects www.pinterest.ca

    Woodworking Plans

    Woodworking plans store.woodandshop.com

    Minggu, 07 September 2025

    105+ Kids Storage Cubes With Cushion

    The secrets to happy children www.angelibebe.com

    Opening: Creating Your Own Kid-Friendly Storage Cubes with Cushion
    Tired of toys scattered everywhere? Want a comfortable and stylish way to organize your kids' belongings? This guide will walk you through building your own set of storage cubes with a cushioned top, perfect for adding seating and storage to any playroom or bedroom. This DIY project is customizable to fit your space and preferences.
    Step 1: Planning and Materials
    Before you start, determine the dimensions and number of cubes you want. Consider the space available and the types of items you'll be storing. Once you know what you need, gather your materials.
  • Lumber: Plywood or MDF (Medium-Density Fiberboard) are good options. Decide on the thickness based on your desired sturdiness.
  • Cushion foam: Choose a comfortable density and thickness.
  • Fabric: Select a durable and kid-friendly fabric for the cushion covering.
  • Wood glue
  • Screws or nails
  • Sandpaper
  • Paint or stain (optional)
  • Measuring tape
  • Saw (circular saw or hand saw)
  • Drill
  • Staple gun
  • Sewing machine (optional, for a more professional cushion cover)
  • Step 2: Cutting the Wood
    Cut the lumber according to your planned dimensions. Each cube will require six pieces: a top, bottom, two sides, and a back. Accuracy is key to ensuring your cubes fit together properly. Double-check all measurements before cutting.
  • Cut all the sides, tops, backs and bottom of each box based on the planned dimension using your measuring tape and saw.
  • Step 3: Assembling the Cubes
    Assemble each cube using wood glue and screws or nails. Apply glue to the edges of the pieces and then secure them with screws or nails. Ensure the corners are square for a professional look.
  • Apply wood glue to the edges to connect, and then add the screws to all sides.
  • Step 4: Sanding and Finishing
    Once the cubes are assembled, sand all surfaces smooth. This will remove any rough edges and prepare the wood for painting or staining. If desired, paint or stain the cubes to match your decor.
  • Sand the entire boxes well.
  • If you want you can paint or stain the boxes.
  • Step 5: Creating the Cushion
    Cut the cushion foam to the size of the tops of your cubes. Cut the fabric slightly larger than the foam, allowing enough material to wrap around the edges. Sew the fabric to create a cushion cover. If you don't have a sewing machine, you can use fabric glue or hand-sew the cover.
  • Cut the cushion to the size of the tops of the boxes.
  • Cut the fabric, but a little larger than the foam and sew to make a cushion cover.
  • Step 6: Attaching the Cushion
    Wrap the fabric around the foam and staple it to the underside of the foam using a staple gun. Ensure the fabric is taut and wrinkle-free. Then, attach the cushion to the top of one or more of the cubes using screws or strong adhesive.
  • Wrap the fabric and staple with staple gun to the underside of the foam.
  • Attach the cushion to the top of the boxes using screws or adhesive.
  • Conclusion: Enjoy Your New Storage Solution
    Congratulations! You've created your own set of kid-friendly storage cubes with a cushion. These cubes offer a practical and stylish way to organize your child's toys and belongings, while also providing a comfortable seating area. Customize the design and finish to perfectly match your home's decor. Now, fill them up and enjoy the newly organized space.

    Act For Kids

    Act for kids www.actforkids.com.au

    The Secrets To Happy Children

    The secrets to happy children www.angelibebe.com

    Summer Skin Care Tips For Kids

    Summer skin care tips for kids www.liveabout.com

    Sabtu, 06 September 2025

    54+ Hanging Plant Wall Shelf

    Hanging pictures with rope at tristan oflaherty blog storage.googleapis.com

    Introduction: Bringing the Outdoors In Hanging plant wall shelves are a fantastic way to add greenery to your home without sacrificing valuable floor space. This guide will walk you through building your own stylish and functional hanging plant wall shelf, allowing you to create a beautiful indoor garden.
    Materials You'll Need:
    • Wood planks (Choose the size and number of planks based on your desired shelf dimensions. Pine, cedar, or reclaimed wood are good options.)
    • Rope or macrame cord (Choose a material strong enough to support the weight of your plants.)
    • Drill with drill bits
    • Sandpaper
    • Wood stain or paint (optional)
    • Measuring tape or ruler
    • Pencil
    • Scissors
    • Eye hooks (optional, for wall mounting)
    Step 1: Preparing the Wood First, cut your wood planks to the desired length. If you're buying wood from a hardware store, they often offer cutting services. Next, sand all surfaces of the planks until smooth, paying special attention to the edges. This will prevent splinters and create a more professional finish. If you choose to stain or paint your wood, do so now and allow it to dry completely according to the product instructions.
    Step 2: Drilling the Holes Using a measuring tape and pencil, mark the locations for the rope holes on each plank. Ensure the holes are equidistant from the sides and the same distance apart on each plank. For a consistent look, use a template. Drill the holes using a drill bit slightly larger than the diameter of your rope.
    Step 3: Assembling the Shelf Cut the rope into equal lengths, enough to hang your shelf at your desired height, remembering to account for knots. Thread the rope through the holes in the first plank. Tie a knot under each hole to secure the plank. Repeat this process for each subsequent plank, ensuring the shelves are evenly spaced. Use a level to check the alignment of the shelves as you go.
    Step 4: Hanging Your Shelf Decide where you want to hang your plant shelf. You can either hang it directly from the top loop of the rope or install eye hooks in the wall for added stability. If using eye hooks, make sure they are securely fastened to the wall studs. Adjust the ropes to ensure the shelf hangs straight and level.
    Step 5: Styling and Finishing Touches Now comes the fun part: adding your plants! Choose plants that are well-suited to the light conditions in your chosen location. Arrange the plants on the shelves, considering their size, color, and texture. You can also add decorative items like small figurines or candles to personalize your shelf. Make sure that you do not overload the shelves.
    Conclusion: Enjoy Your DIY Hanging Plant Wall Shelf With a little time and effort, you've created a beautiful and functional hanging plant wall shelf. This project is a great way to add a touch of nature to your home and showcase your favorite plants. Enjoy your new indoor garden!

    How To Dead Hang

    How to dead hang www.usa-homegym.com

    Hanging Pictures With Rope At Tristan Oflaherty Blog

    Hanging pictures with rope at tristan oflaherty blog storage.googleapis.com

    It's Time For Some Hanging/strangling Content

    It's time for some hanging/strangling content www.reddit.com